To Create and Send a Scheduled MMS, follow the steps below.
Step 1
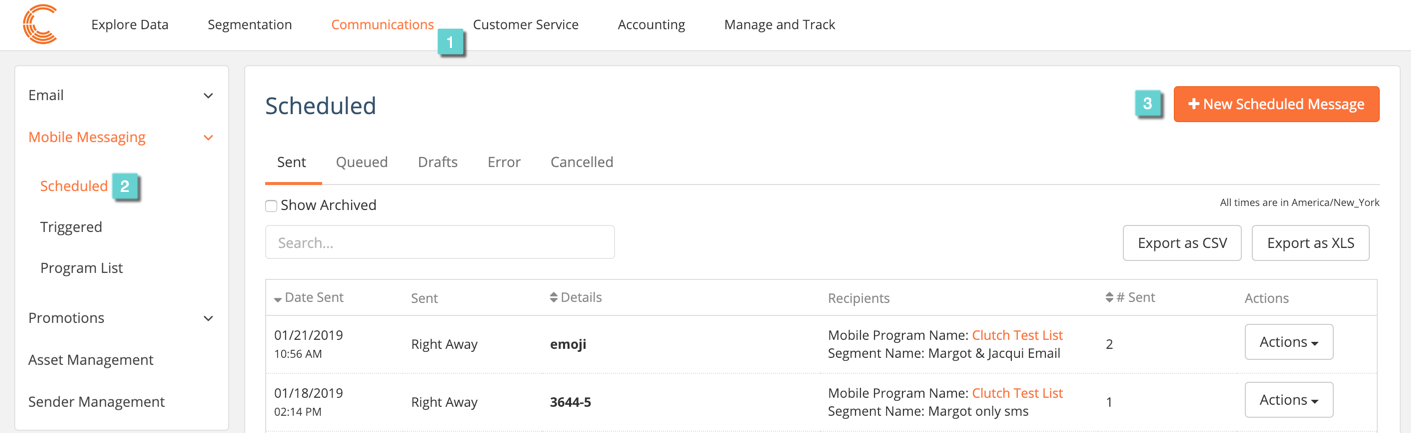
1.1 Navigate to Communications section of Clutch Portal.
1.2 Navigate to Scheduled under the Mobile Messaging tab.
1.3 Select New Scheduled Message.
Step 2
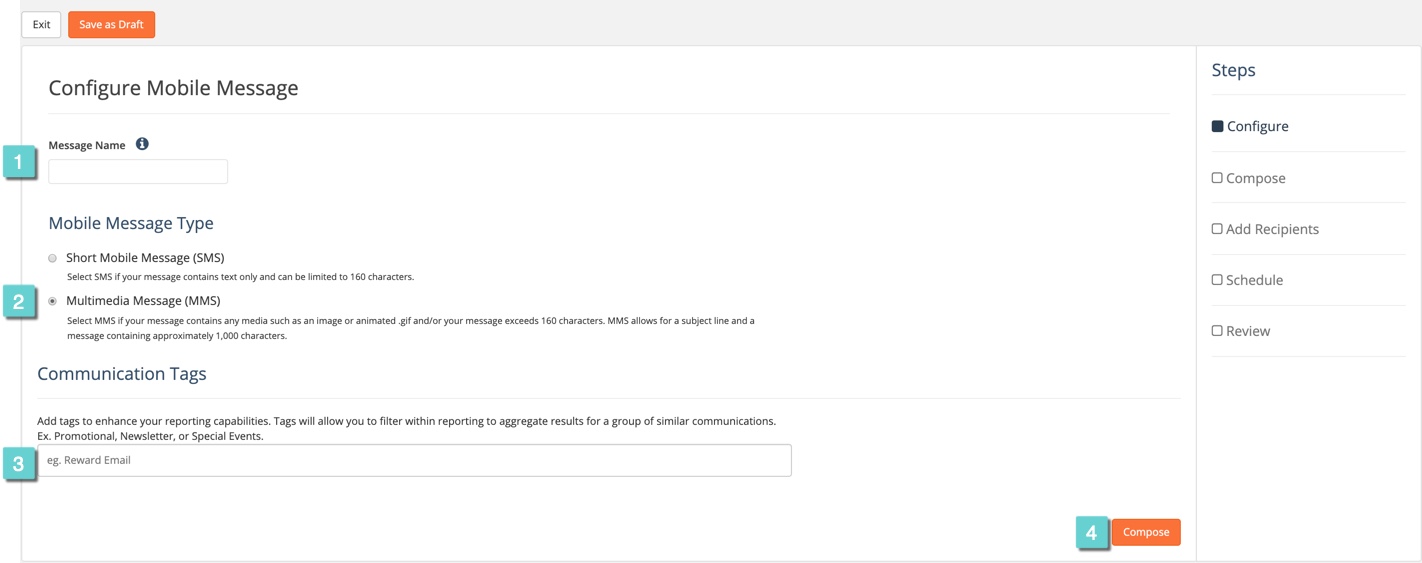
2.1 Create a name for your message.
2.2 Select MMS.
2.3 Optional: Provide Communications Tags for your message. By tagging and grouping messages, you can analyze how certain categories of messages are doing as a whole. To learn more about Communication Tags, read the article here.
2.4 Select Compose to move on to the next step.
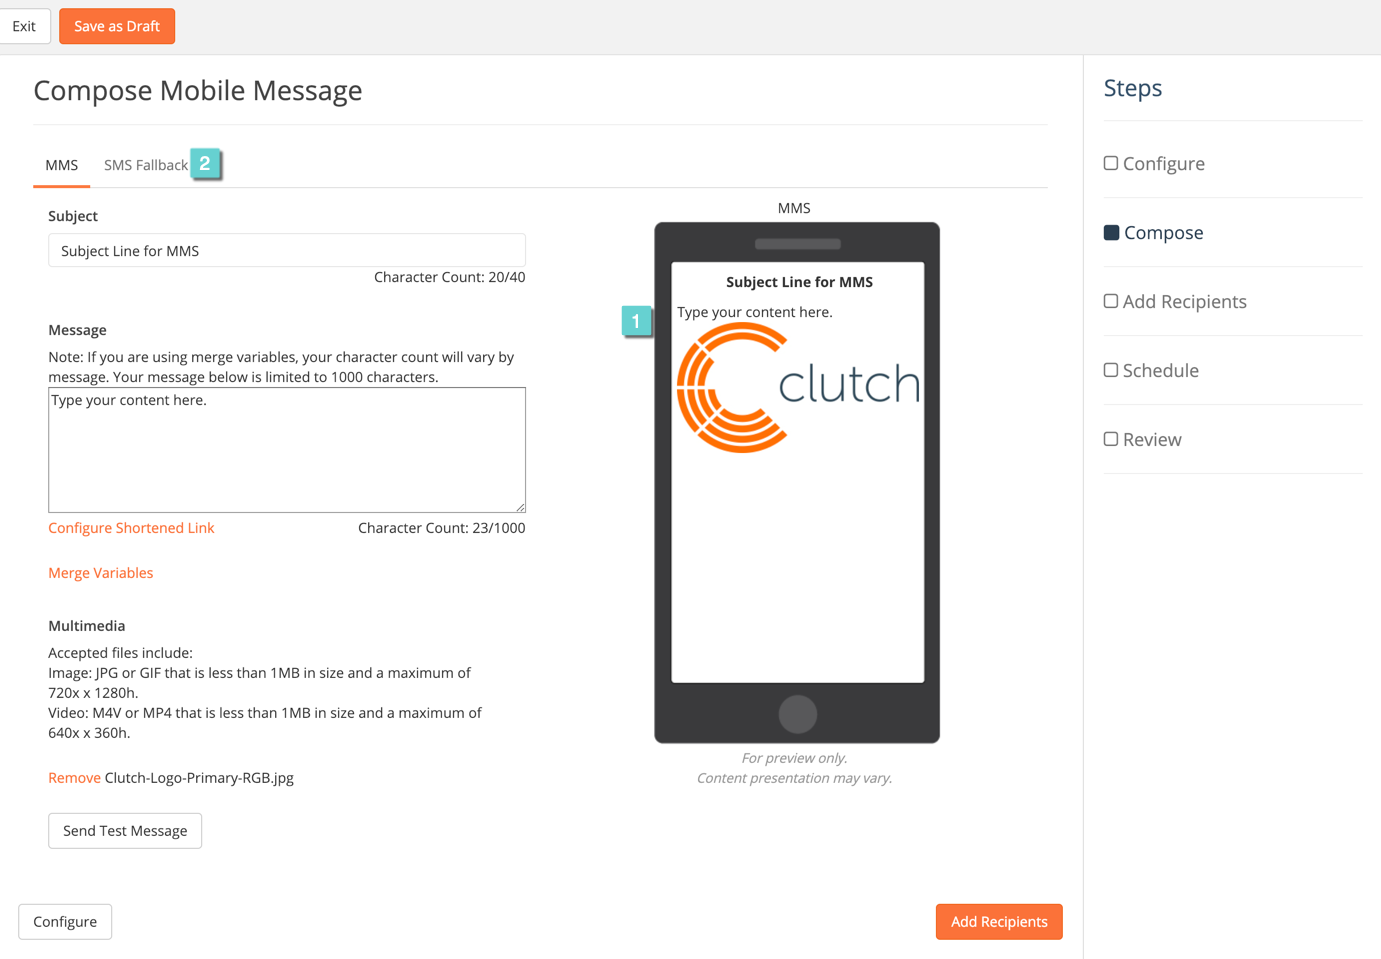
Step 3
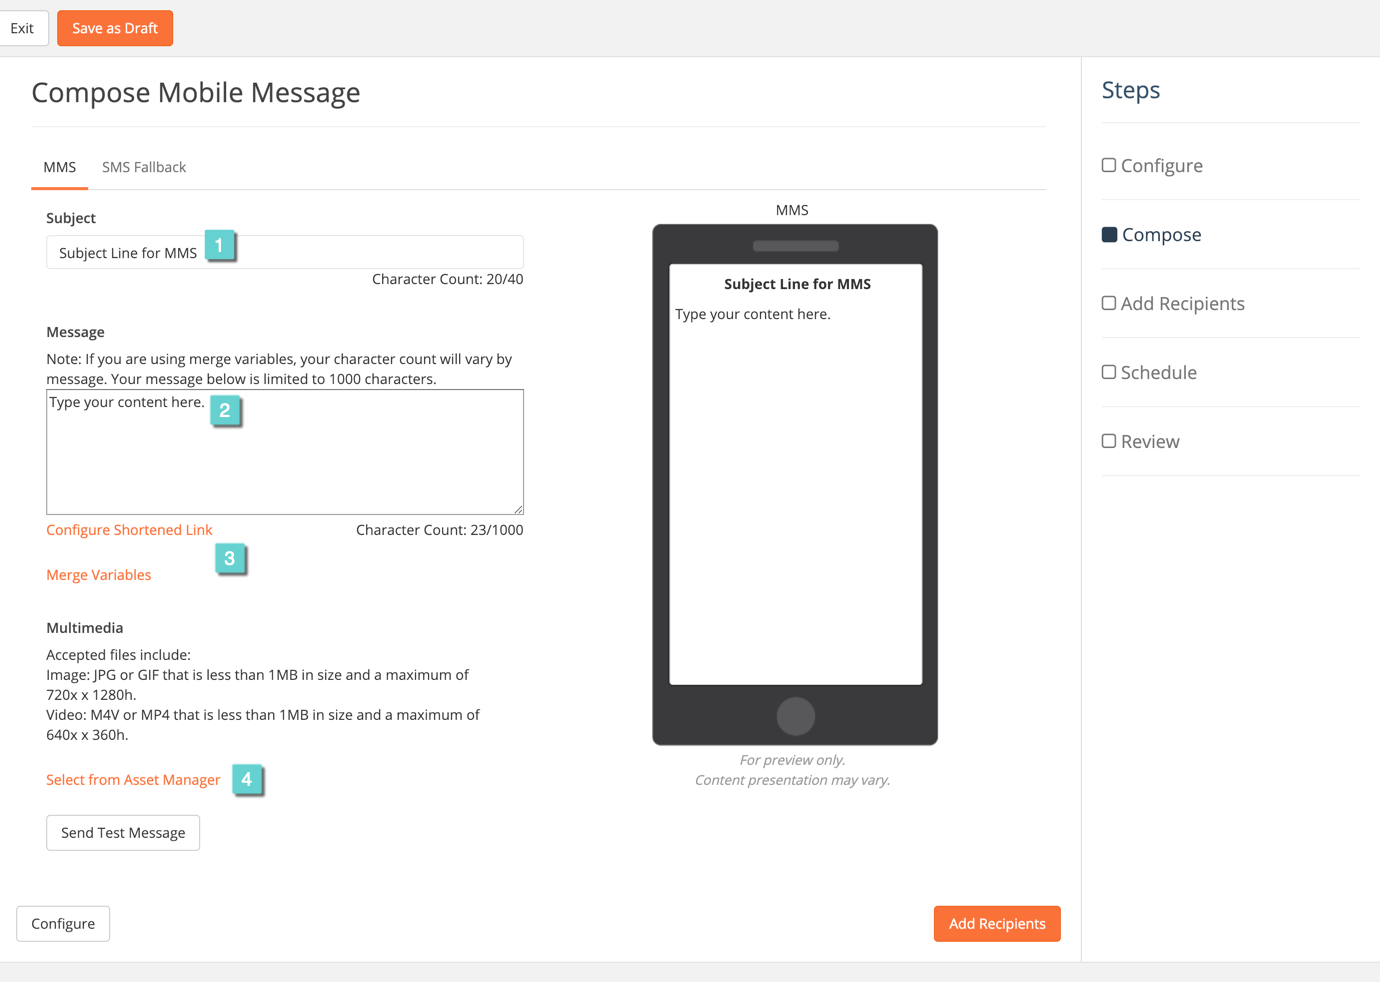
3.1 Create a Subject for the MMS, which will appear at the top of your message.
3.2 Type the content of your message. Simultaneously, see the text appear to the right in the prototype phone.
3.3 You have the option to see a list of merge variables that you can use in your message or to configure a shortened link.
3.4 Add an image, GIF, or video by clicking Select from Asset Manager.
Step 4
4.1 Select an image, GIF, or video directly from Asset Manager or drag a file directly into the popup and it will automatically be added to your asset manager. Click Select Image to add the file to your MMS.

Step 5
5.1 View your image and all content in the phone prototype.
5.2 Click the SMS Fallback tab.
Step 6
6.1 Create a fallback message for customers who are not able to receive a MMS. Simultaneously, see the text appear to the right in the prototype phone.
6.2 (Optional) Click Configure to go back to the previous screen.
6.3 Click Add Recipients to move on to the next step.

Step 7
7.1 Select the Mobile Program you would like to send the message to.
7.2 Determine if you would like to filter the list by sending to a segment.
7.3 View the estimated recipients.
7.4 Select Schedule to move on to the next step.

Step 8
8.1 Determine the timing of when the message will be sent.
- Send Right Away: All messages will start processing immediately upon submission and will begin sending in approximately one hour. Based on processing volumes, actual delivery time may vary and can take upwards of an additional hour to send completely.
- Send Simultaneously: All messages start processing at the selected time. Based on processing volumes, actual delivery time may vary and can take upwards of an hour to send completely. *must be scheduled for at least 65 minutes in the future.
- Send Locally: Messages will start processing at the selected time in the time zone based on the customers Zip Code. For customers with an unknown Zip Code, their message will be process along with the Central Time Zone. Based on processing volumes, actual delivery time may vary and can take upwards of an hour to send completely. *must be scheduled for at least 65 minutes in the future.
Note: When scheduling a mobile message, a warning message may appear to prevent you from scheduling text messages that would be received between 8 PM and 8 AM in a customer’s respective timezone.
8.2 Select Review to move on to the next step.

Step 9
9.1 Review and Confirm all information is correct.
9.2 Select Submit and your MMS will be sent at the scheduled time.

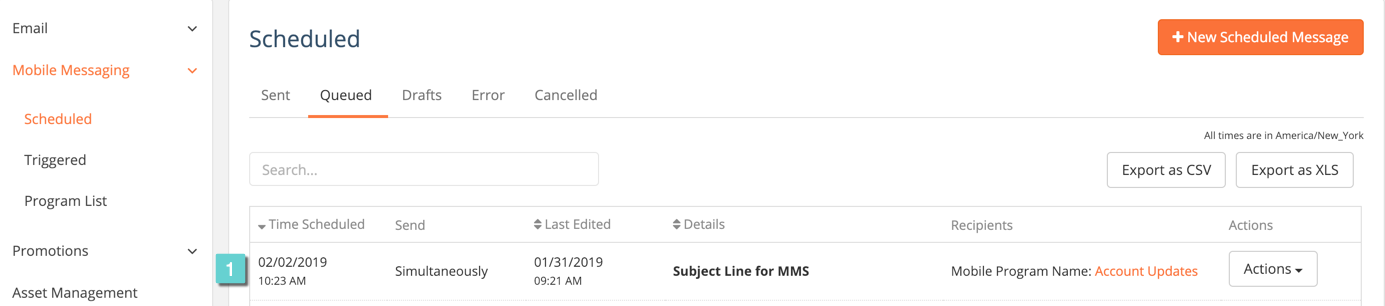
Step 10
10.1 See that your message is scheduled to send in the Queued tab.