Enabling Two-Step Google Authentication is one way to better protect your account. This involves downloading the Google Authenticator App to your mobile device. Once two-step authentication is activated, you will need the Google Authenticator code from your device when logging into your account. Make sure the time on your phone is correct. If it is ahead or behind at all, then the codes generated won’t be in sync with the server and will not work. Click here to learn more about Clutch’s Two-Step Authentication. To set up Two Factor Authentication using Google Authenticator, follow the steps below.
Step 1
Navigate to the top right-hand corner of the screen to the menu under your brand. Click on “My Account”.

Step 2
Select the “Two-Step Authentication” button on your account page.

Step 3
You’ll be brought to a page explaining your two-step authentication options. Click the button to configure Google Authentication.

Step 4
Enter your password for verification.

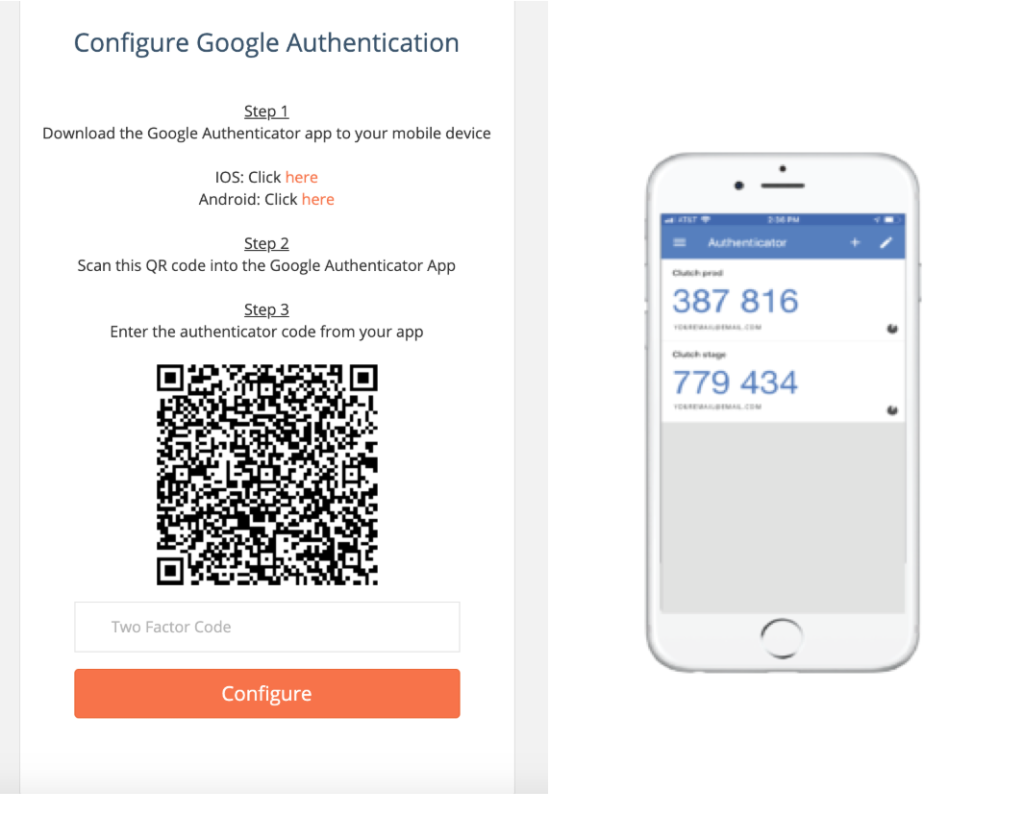
Step 5
Follow the prompted instructions. You can install Google Authenticator on our iOS device here and for Android here. Once you’ve downloaded the mobile app for your device, open the app. Click the “+” button on the top right-hand corner. Scan the barcode image. Then, enter the number that appears for “Clutch”, and click “Configure”. Enter the 6 digits provided with no spaces.
Step 6
You’ll receive a confirmation message informing you that Google Authentication has been properly configured. You will now be able to use this app as an extra layer of protection when accessing your Clutch account.

Step 7
Additionally, you’ll receive an email confirming that an Authenticator App was added.

If you have any questions, you can submit a request here.
