To create and schedule an Email follow the steps below:
Step 1
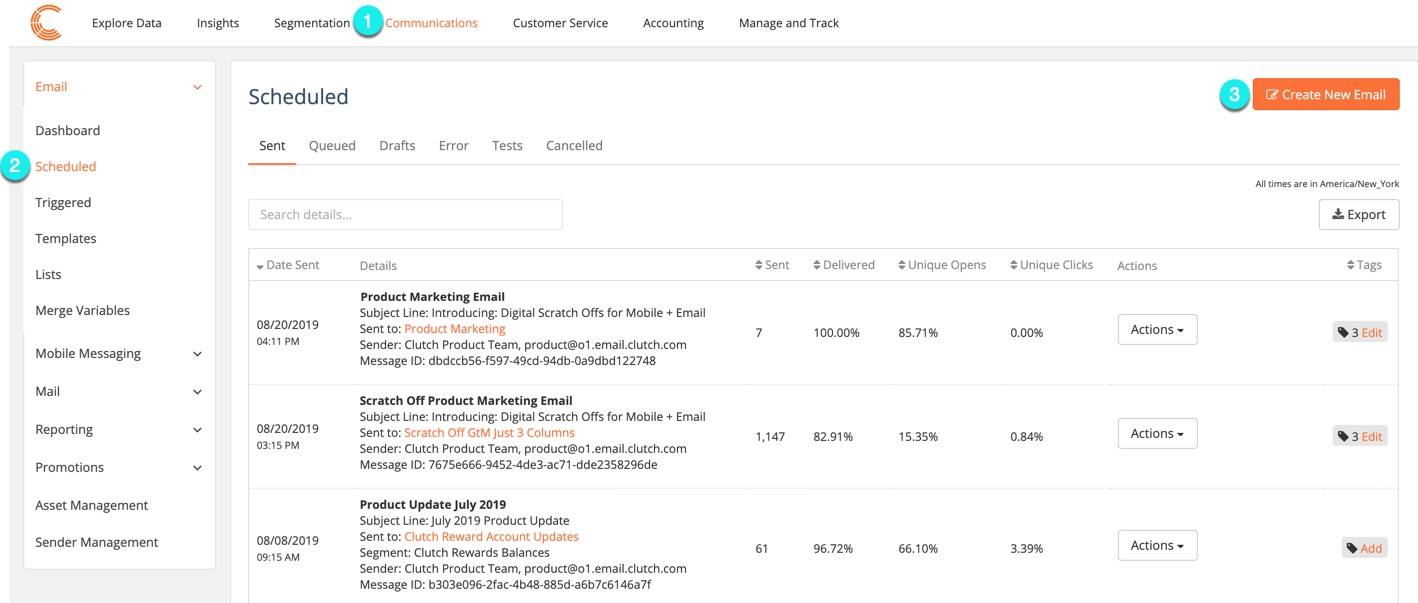
1.1 Navigate to the Communications section of the Portal.
1.2 Select the Scheduled Tab under Email.
1.3 Click the Create New Email button.
Step 2
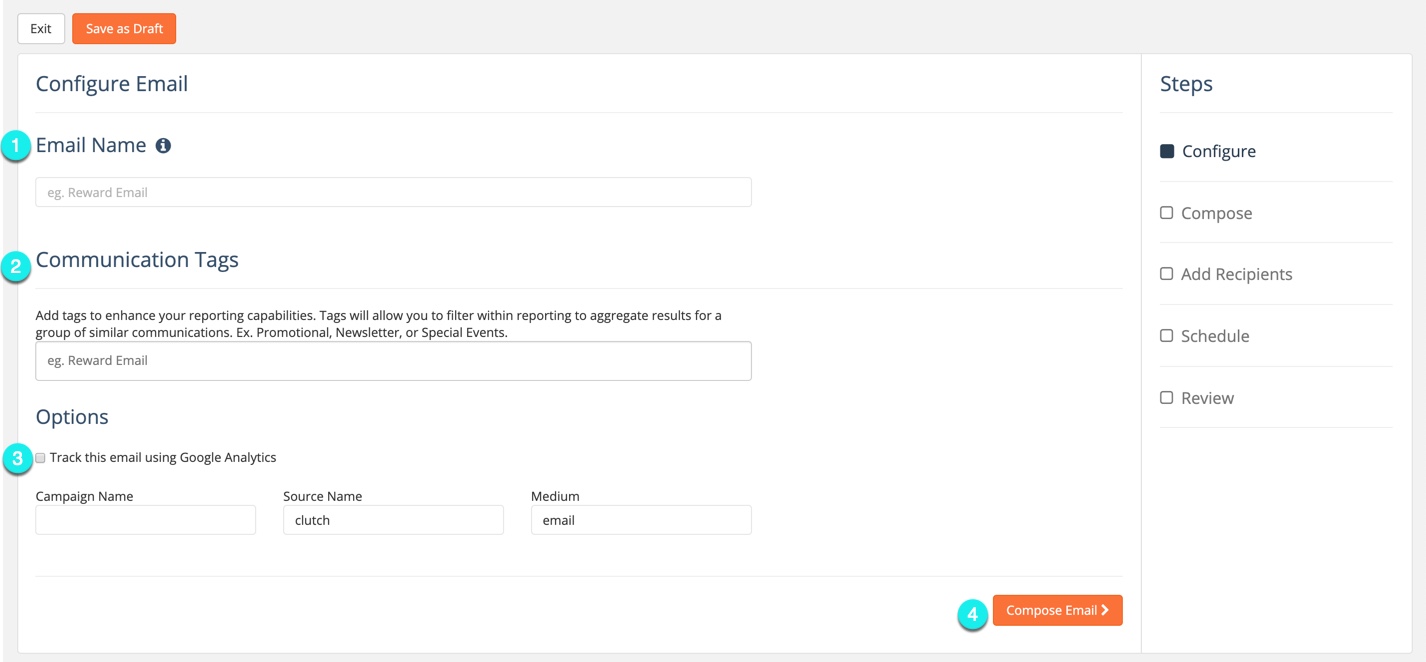
2.1 Create a name for your email.
2.2 Optional: Provide Communications Tags for your message. By tagging and grouping messages, you can analyze how certain categories of messages are doing as a whole. To learn more about Communication Tags, read the article here.
2.3 Optional: Track this email using Google Analytics. You can elect to track your emails by campaign name, source name, and medium (ex. email, mobile message, etc.) to better monitor and analyze your marketing messages.
2.4 Click the Compose Email button.
Step 3
3.1 Select a sender for your email. If you still need to create a sender, read the article here.
3.2 Create the subject of the email. This will be what your customers see.
3.3 Optional: Create Preview Text for your email. This is the snippet of text that appears after the email subject line in most email programs.
3.4 Optional: Select a template to create your email from.
3.5 Optional: Once your email is composed, send a test email. Testing your email is highly recommended.
3.6 Create the body of your email using the editor. For information on how to use the WYSIWYG editor, read the article here.
3.7 Click the Add Recipients button to move to the next step.

Step 4
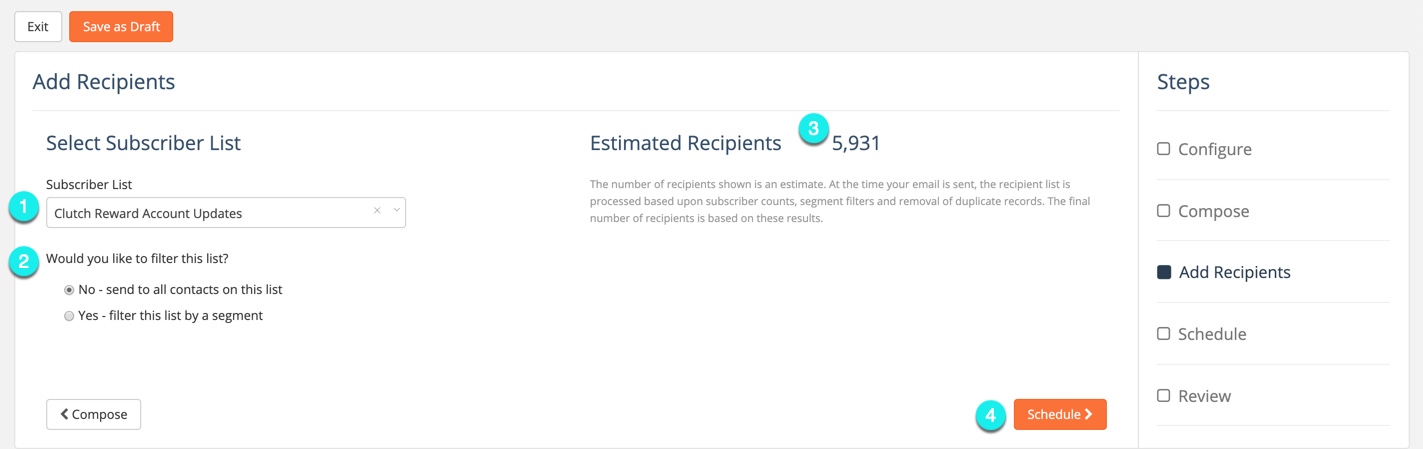
4.1 Select the email list that you want to send the message to.
4.2 You have the option to filter your list down by a segment or to send out to all subscribed customers or contacts.
4.3 The estimated number of recipients is an estimate of the number of customers who will receive your message.
4.4 Click Schedule to move on to the next step.
Step 5
5.1 Decide if you would like the message to be sent right away, sent at a certain date and time, or at an optimized send time, meaning the user will receive the email during a time they’re more likely to check their email.
5.2 Click Review to move on to the next step.

Step 6
6.1 Review your message. Once you confirm all information, click Submit.

Your message will begin processing for distribution once you click Submit, or a few hours prior to the scheduled time.
