There are many different ways to filter your customer data and hundreds and thousands of possible segments you could create. Follow the steps below to learn how to create a new segment and the fundamentals behind the Clutch segment builder.
To learn how to create examples for specific segments, you can check out our articles here.
Step 1
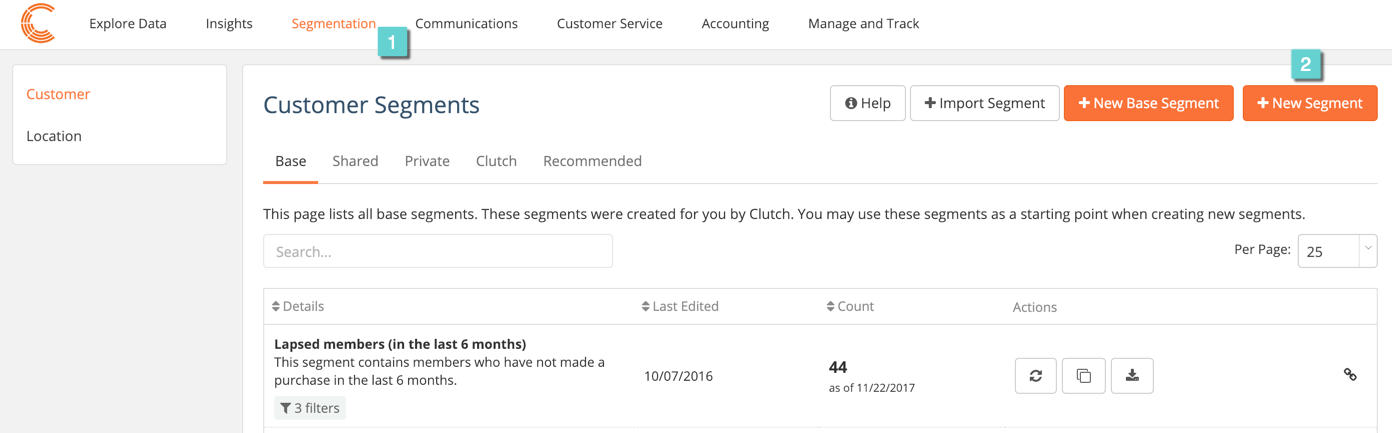
1.1 Navigate to Segmentation.
1.2 Click the New Segment button.
Step 2
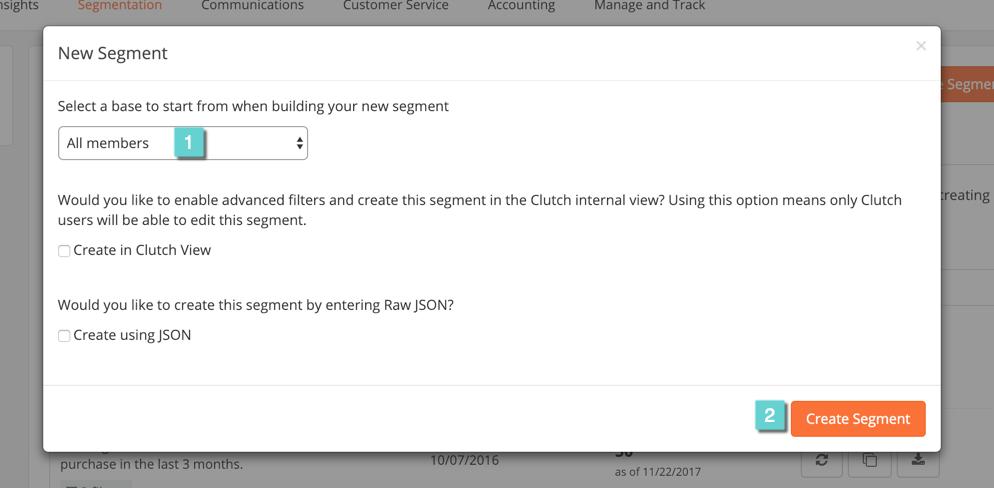
2.1 Select a base segment to start from. For example, if you’d like to create a segment of members who live in Pennsylvania, select “All Members” as your base. By starting from the “All members” base, the filters needed to select all your members will be applied automatically and all you’ll have to do is apply an additional filter to select customers with an address in PA.
2.2 Click the Create Segment button to create your segment.
Step 3
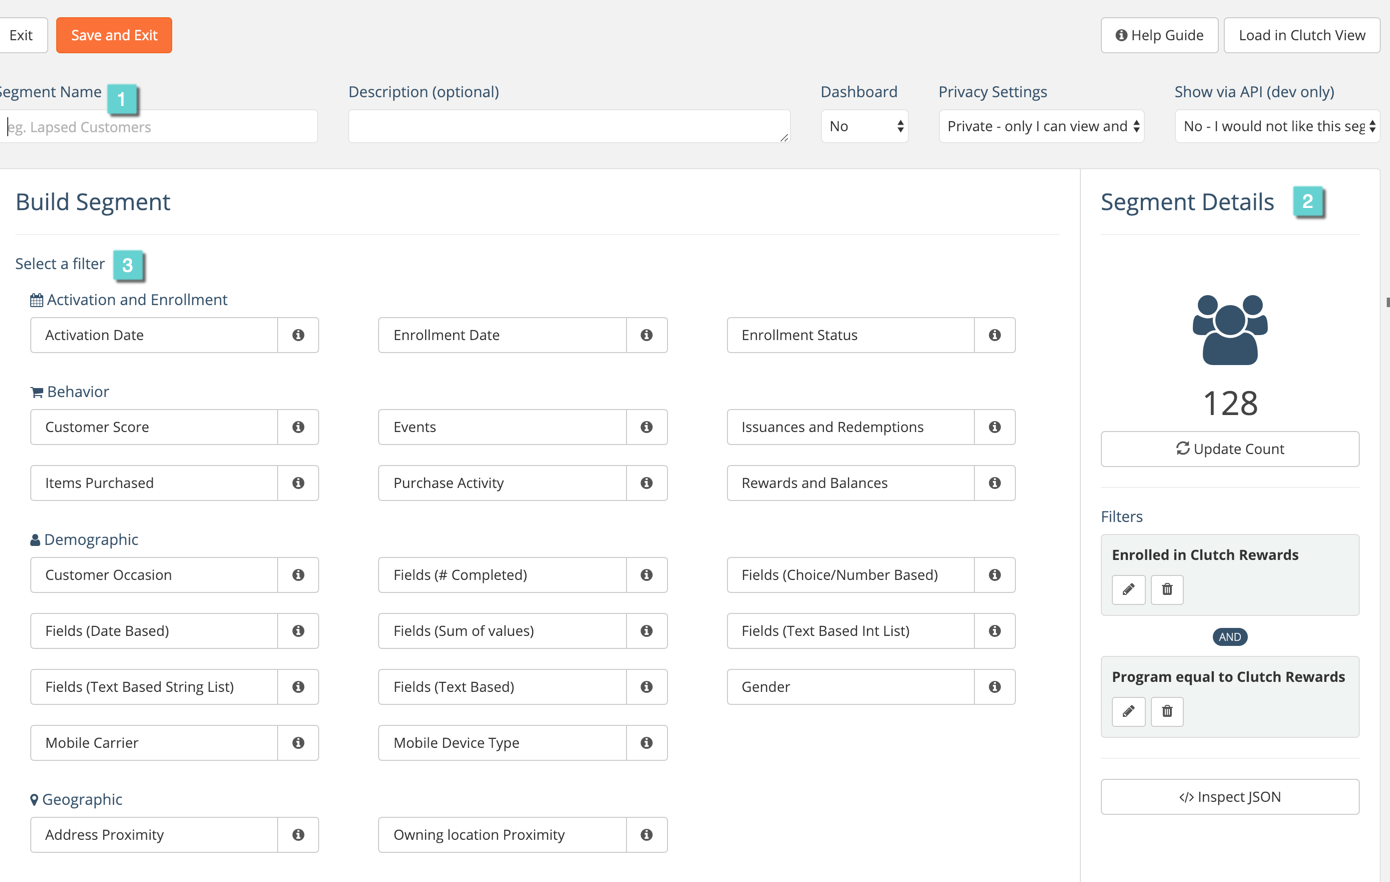
Welcome to the segment builder!
3.1 Across the top you can enter a name, description and choose a privacy setting for your segment.
3.2 On the right are your segment details including applied filters and the number of customers in your segment. You’ll notice some filters have already been applied. These filters were created automatically from the base segment.
3.3 On the left you’ll see the available filters grouped by category. Selecting a filter is the first step when building a new segment. You can click the info icons to read about each filter. Click on the name of a filter to select it and open up the available conditions.
Step 4
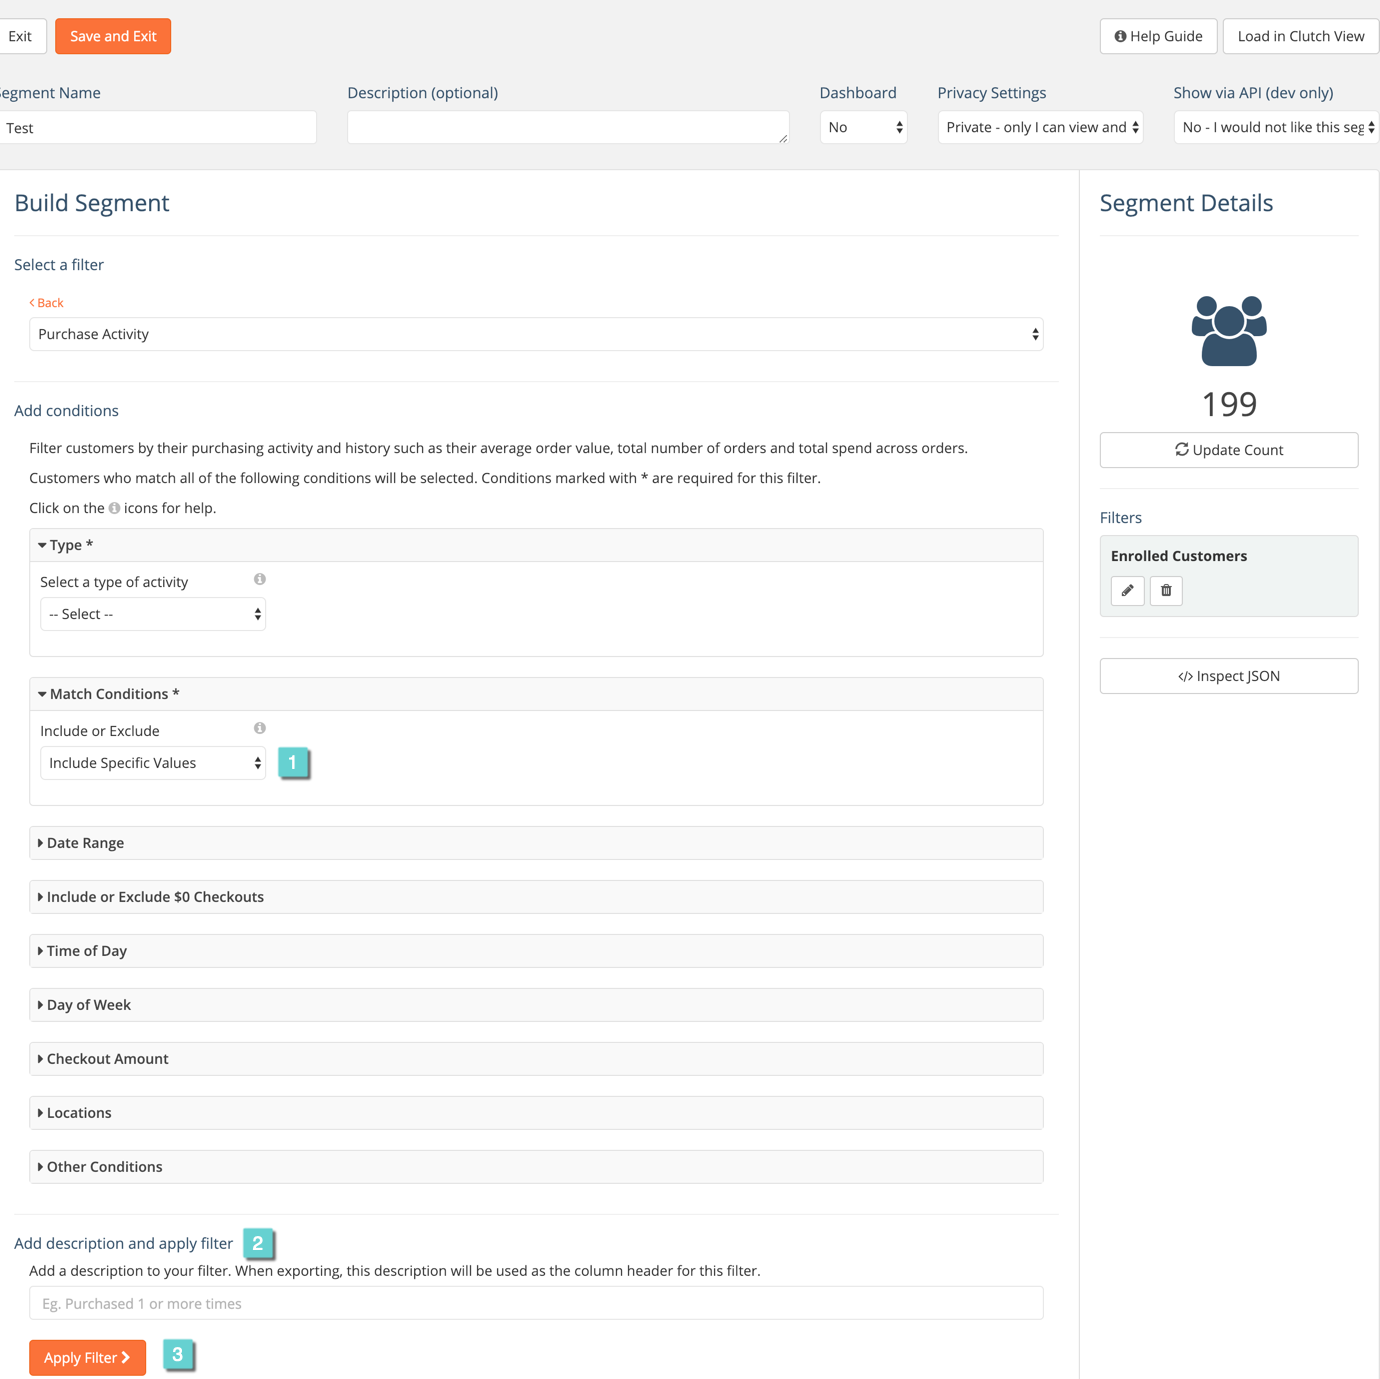
Segments are made up of filters. Each filter has one or more conditions. Applying a filter queries your customer database and selects all customers that match the conditions of your filter.
4.1 Add conditions to your filter. Conditions marked with * are required. You can click on the info icons to learn more about each option. Most filters will have a group of inputs called Match Conditions. These inputs are where you can set the minimum, maximum or specific values for the filter.
4.2 Once you’ve added conditions to your filter, the final step is to give your filter a description and apply it. Enter a description that will help you (and possibly other users of your Clutch account) remember and/or understand the conditions of this filter. This description will also be used as a column header if you export the filter.
4.3 Click the Apply Filter button to apply your filter.
4.4 You’ll now see your filter listed under the segment details on the right.
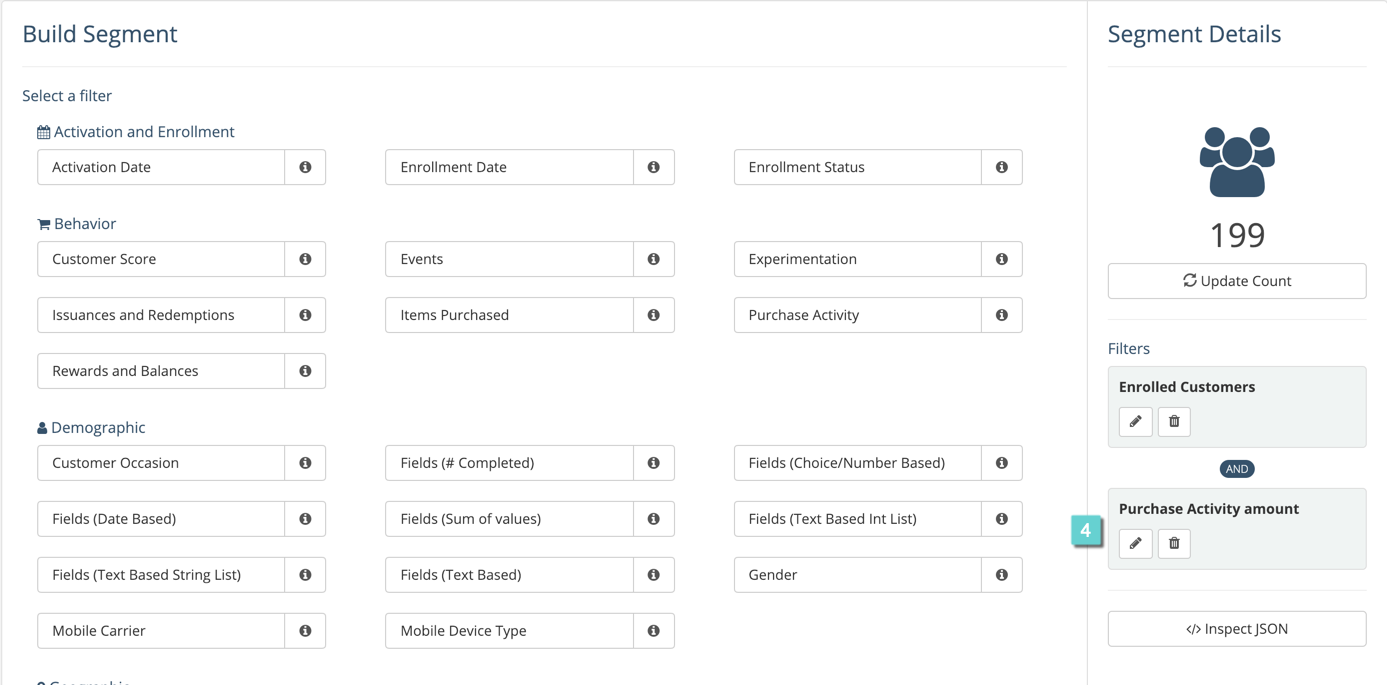
Step 5
Continue to add filters to your segment by repeating step 4. Each time a filter is added it performs an AND in the query. This means the segment will contain the customers who meet all of the conditions in each filter. In the example above, the customers selected in the segment will have a card in the brand’s loyalty program and be enrolled and have an active card and will have made 3 or more purchases in their lifetime.
When you’re ready to save your segment, click Save and Exit to save your segment and return to the segmentation home page. From here you’ll be able to export your segment or send an email to the customers in your segment from the communications section of the portal.
